Wednesday, August 8, 2012

Nursery Ideas

With less than two months to go until her due date, it's high time that the baby's room gets updated from man cave to nursery.  Here's what the room has looked like (roughly) for the past year:


Since these photos were taken, we've added a chair, a big old steamer trunk in place of that puny Ikea table, and a large dresser.  Drew has been using the closet and dresser for his clothes which means, ahem, that there's usually workout clothing, loose change, collar stays, and other miscellaneous stuff strewn about. (There's also the entire bookshelf full of Nazi books.  Just remember that Drew is a historian, not a white supremacist.)

I don't know about you, but none of this says "baby's room" to me.

To save poor Drew more painting, I tried my darndest to find a way to decorate the room that would suit a little girl and keep the blue walls.  I figured that I would find a fabric or a piece of wall art that I really liked with blue in it and base the rest of the room off of that.  Easy, right?

NO.  Not easy.  This country is so darn gendered that it was really, really tough to find cute stuff that didn't absolutely scream BOY.  I found several pretty calico fabrics that were flowered and had the right blue in them, but they were very pastel-y overall and we wanted to use bright colors in the room.  I did find this fabric at Ikea and thought we might have a winner:

Potential curtains/fabric

But then Drew said it was too sixties (seventies?) so that was out.  It's not that I object to a blue room for a little girl (and I certainly don't want a room full of pink either) but then I realized the real problem was the walls - the blue has always been my least favorite paint color in the whole house.  It's sort of blah and doesn't really go with any of the other colors.  Given that we'll be spending lots and lots of time (much of it in the middle of the night) in this room, it seemed to me like a paint job was in order.  I presented all of this to Drew and he begrudgingly agreed to paint the walls.  Once that happened, the fabric hunt was much easier.  After more searching, I found this fabric in a quilting magazine at Drew's mom's house:

$10.50 Yard

Eureka! Girly but not too pink, lots of great colors (red! turquoise!) to use elsewhere, kid-friendly but not stupid, etc.

I decided to use this fabric to make roman shades (which, FYI, turned out to be a terrible idea - more on that later).

Jumping off from there, we chose this cheery green indoor-outdoor fabric ($7 per yard!) to reupholster our much-loved rocking armchair:

$7.18/yard Premier Prints Indoor/Outdoor Dixie Solid Greenage

Drew has painted the walls a light gray-green (picture a color in between the green in the dining room and the gray in the bathroom), which has brightened up the space considerably.  Once I get the roman shades finished and hung, we'll post a few photos of the actual room.

Until then, please send me good sewing vibes.  I'm armed with a seam ripper and a steady supply of curse words, so I think it'll be okay.

Sunday, July 29, 2012

Tiling the Backsplash

Forgive me, blog followers, for I have lapsed.  It has been a million years since my last post.

I know the whole blog thing only works if you post regularly and all that, but we've had some bumps in the road lately.  Nothing big, just that it took us awhile to get our courage up to permanently affix porcelain tiles to our walls and then Drew took my computer and camera overseas with him (goodbye photographic evidence!) and then several thousand items on the ol' to-do list overtook our lives.  We'll blame the nesting instinct, which seems to express itself as "stuff Drew needs to do RIGHT NOW" in our house.  

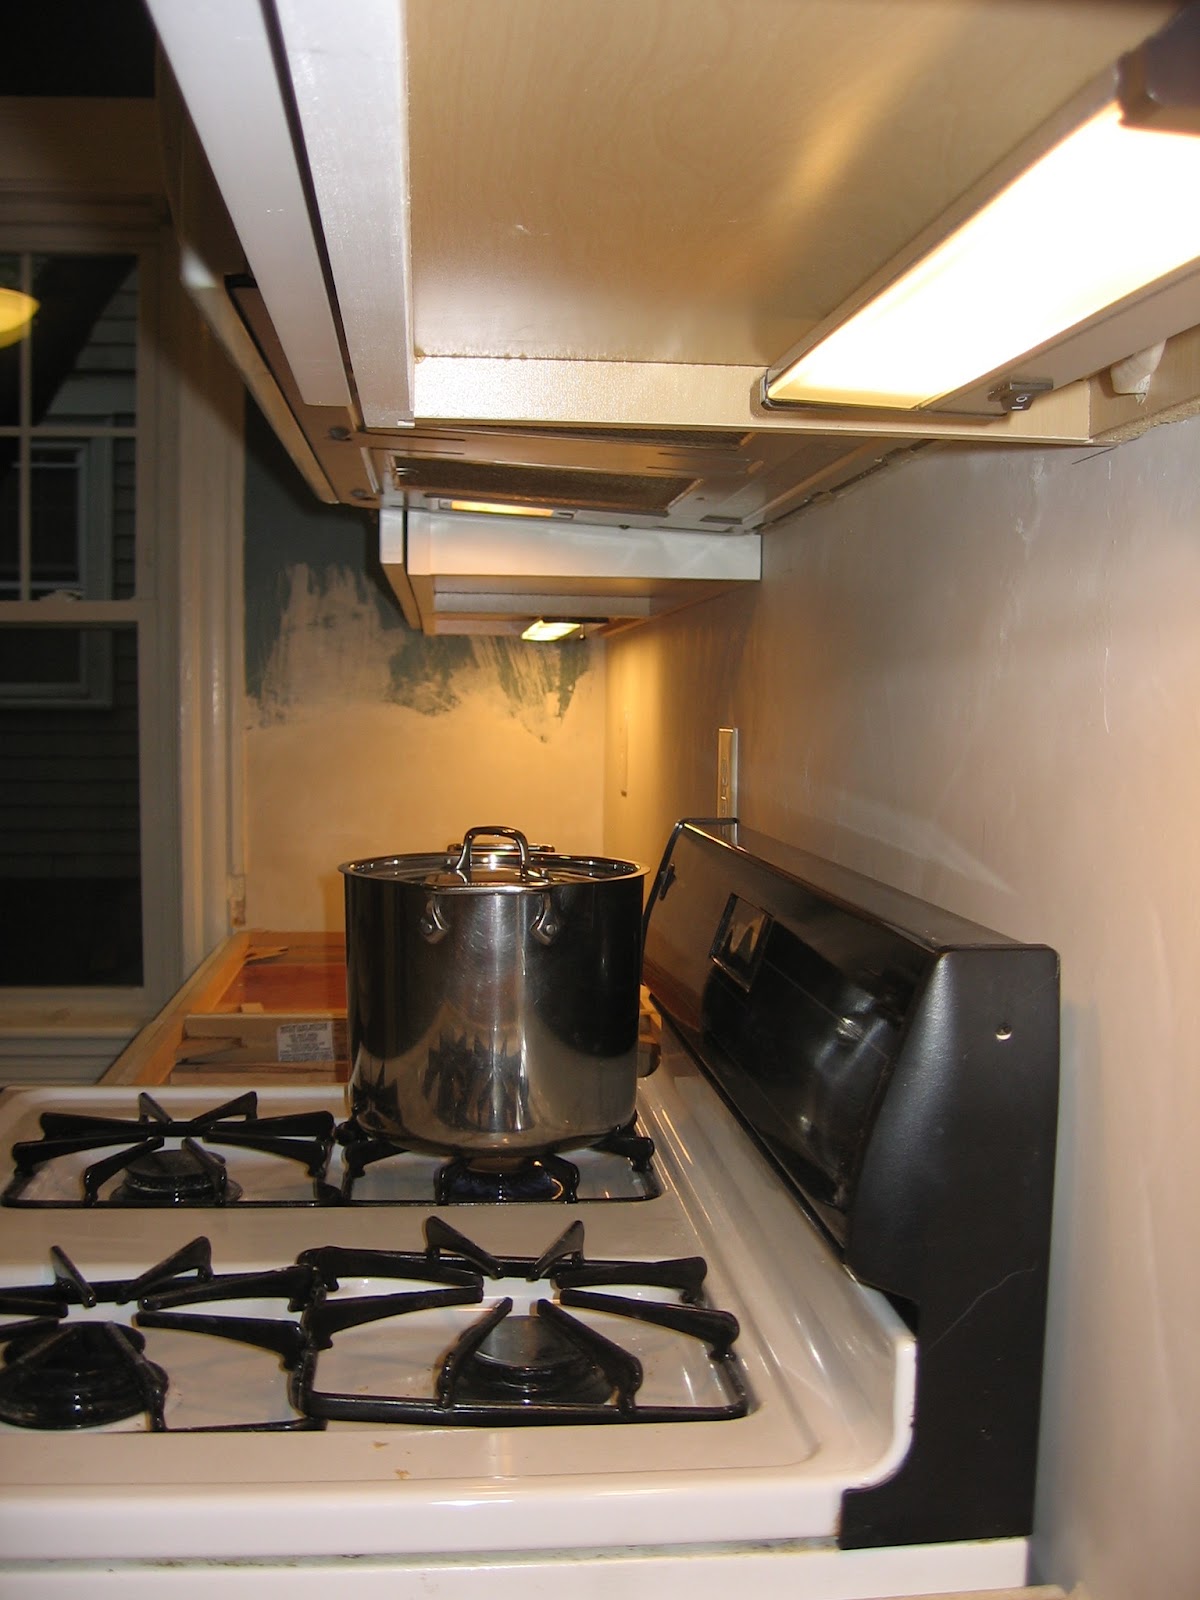
At any rate, the backsplash is tiled, grouted, and sealed.  It's not caulked around the edges (that's still on the to-do list) but you can get the gist.  If you'll remember, when we last left off with this project, our walls looked like this (but with a faucet):


and this (but with a countertop to the left of the stove): 


We lived like that for awhile, and then we decided that splattering spaghetti sauce and dishwater and other miscellaneous kitchen substances on bare plaster was probably not a good long-term thing to do.  So we got 'er done.

We used pre-mixed mastic, which was recommended to us by the fine folks over at Home Depot.  It was incredibly easy to work with - just dip the trowel into the goop, smear it on the wall, and stick the tiles up.  No mixing and no powder everywhere.  In the photo below, you can see that the trowel makes ridges in the mastic as you spread it on the wall.  This ensures that there is a "just right" layer of mastic on the wall to hold the tiles up but not squish out everywhere.  Brilliant.


And then came the tiles.  We started the pattern in the lower left hand corner and stair-stepped across, being sure each row stayed level.  Initially, we were using spacers in between all the tiles but then we realized that we had inadvertently purchased "self-spacing" tiles.  Things moved a lot faster after we figured that out!

Drew was in charge of tiling and I was in charge of cutting, which worked out well.  My first set of cuts was simple - I just had to snap a bunch of tiles in half to butt up against the door frame to get the pattern going correctly.  You can see the fruits of my labor sitting in the counter in the photo above.  My tools were rather unorthodox, but they did the job:


Here's what I used -

1. Tile snipper.  First you score the tile with a sharp little wheel and then you clamp the tile and snap it along your score line.

2. Teach for America Magazine to use as a guide for the sharp little wheel, which has a mind of its own without something to rest against.

3. Some other magazine to use under the tile as I was scoring.  Our poor kitchen table has a few scars from before I realized that I needed a barrier.

4. Chanel lip pencil to mark the tiles.  This pencil was a free sample approximately 10 years ago.  Since that point, it has become abundantly clear that I'm not a lip pencil kind of gal.  We didn't have a grease pencil or something more properly suited to the task, and I didn't want to use a sharpie or anything permanent, so Chanel has been sacrificed to the cause.  Sorry, Coco.

Though my snipping technique quickly became pretty good, we eventually faced the fact that we needed to make some finicky cuts to get around the outlets.  The snipper is only good for cuts that travel all the way across the tile.  It doesn't do corners or anything, which we clearly needed (see below).  We could have gone the lazy route, like some previous occupant did with the shower tiles, and cut up a bunch of squares to piece together around the outlet.  We're not lame like that, however, and we really wanted to do this right.


I taped off the cuts I thought we would need to make (the blue tape is the part of the tile that needs to go away) and we headed to the hardware store.

Please permit me one paragraph to gush about our hardware store.  It's "in town" in our little neighborhood and is owned and staffed by a bunch of twenty-something dudes.  I say "dudes," because they seem to be perpetually hung over.  Nevertheless, they are awesome at figuring out the exact tool you need for any job under the sun.  Also, one time we walked in and Madonna was playing.  LOVE.


They sent us home with a hacksaw blade that looks like a string covered in sand paper.  It took both of us to use (one to hold the tile and one to saw) but it worked like a charm! 


Here's Drew carefully placing our cut tiles around the outlet: 


Ta-da! We turned out to be awesome at this part.  Go team.


The whole giant wall behind the sink took approximately two hours to tile (and would have taken less if we hadn't been using spacers and if we hadn't needed a trip to the hardware store).  The other wall took about the same amount of time because there were THREE outlets that needed careful cuts.  Lucky for us, we had our super hacksaw blade and it was a piece of cake.

Here's the pre-grout photo of the other side (no spacers!).  Before you ask how we got the bottom row to stay up behind the stove with nothing to support it, I'll tell you our secret: Fervent hope plus waiting to pile the rest of the rows on top for a little while.  Luckily, nothing slid down the wall because I'm not sure what we would have done.


Forty-eight hours after tiling, it was time to grout.  Having learned our lesson about powdered grout while regrouting the bathroom last year, we headed straight for the pre-mixed stuff.  A note on color: After asking Drew a million times what color the grout should be, conducting a poll on this very blog, and receiving lots of input from blog readers near and far, Drew decided that he strongly preferred white grout.  I was still undecided, so white seemed like as good a choice as any.

Using the pre-mixed stuff involved dipping the tile float into the bucket of grout, smearing it into the cracks, and getting as much of the grout off the tile faces as possible, like so:


(Once again, I apologize for the terrible quality of these photos.  We need to pull ourselves together on that front.)

Three (?) hours later, we used a wet sponge to clean the rest of the grout off the tiles and to smooth out the grout left in the spaces between the tiles.  Several days later, we sealed the grout so that it wouldn't soak up whatever we send flying at it.

Then we had a choice to make.  Initially we stopped the tiles above the sink right before we would need to make any cuts to get around the door molding (this is a pre-grout photo):


That looked sort of unfinished to me and I wasn't sure it would be high enough to evenly space the open shelving and not look funny.  So we added one more row, and I think it looks much better now.

Here are the "after" photos:

You can see that we still need to caulk where the tile meets the cabinets on top and where the tile meets the countertop on the bottom.  You don't get a wider shot of the area near the stove because the counter has stuff on it from breakfast, which has not been cleaned up yet (don't judge).


Above near the sink, we need to caulk the tile-doorframe space, tile-countertop space, and tile-wall space (off to the right).  Please note the additional row of tile on top, which I think is more aesthetically pleasing than the photo above.  We will put one open shelf approximately four rows of tile from the top and the other one approximately 8.5 rows from the top, leaving a 20 inch clearance between the counter and the bottom shelf.  


We're getting there!  Updates on open shelving, progress (or lack thereof) on the nursery, and other miscellaneous baby preparation items (like totally rearranging our bedroom) to come!


Wednesday, June 6, 2012

Quickie Project - The Back Porch

So the news on the backsplash front is ... that there is no news.  I was out of town over Memorial Day weekend and Drew was out of town last weekend, so we have barely seen one another, much less tackled any major home improvement projects.  I'm not well-suited to sitting around without a project, so I cooked up a surprise for Drew this weekend while he was away.

Drew has been super excited about our back porch since we moved in last August.  For awhile, we were too overwhelmed with the inside of our house to even think about the outside, and then it was winter.  Now that spring/summer has started to show it's lovely face, however, we thought we'd get the back porch set up.

I don't have a before photo of the porch, but it was pretty sad.  Empty of everything but a snow shovel (which didn't even get used this winter) and looking out over an overgrown backyard.

I service of getting the backyard to look a little less wild, we bought a weed wacker a few weekends ago.  (Side note: Apparently "wacker" is not spelled "whacker," as I'd hoped.  Such a missed spelling opportunity.)  We had originally thought a mower would do the job better, but our upstairs neighbor alerted us to the million rocks that lie just under the "grass" (it's really not grass, more like a collection of plants that have decided to grow in the same location).  A lawnmower would have probably sent small rocks whizzing all over the backyard.  It's all fun and games until someone loses an eye, or so they say.  Drew went to town on the backyard with the weed wacker (with goggles on, just in case), including on a few plants that were meant to be there.  Whoops!  It's already all grown back because we've been having some serious Noah's Ark weather around here lately, but it looked great while it lasted.

We also went to Ikea and bought the "TULLERÖ"porch set for $99:


It's surprisingly solid, seems like it will weather relatively well, and is small enough to fit nicely on the porch while still seating four people.  My only complaint is that the bench and chairs are too tall to scoot all the way under the table, so everything is kind of spread out.  Whatever.  For $99, we thought it was a good deal.  We bought a set of matching "SÄRÖ" cushions for $30 so that we wouldn't have to sit directly on the slats.


They're not extraordinarily cushy, but that's probably a good thing just in case they get wet. I wanted to buy more fun stuff for the porch but Drew can only take so much Ikea at one time, so we went home.

We set up the table and put the cushions on the chairs.  Very nice, but missing a certain je ne sais quoi.  This is where my surprise project for Drew came in.  While he was out of town, I went back to Ikea (where I would totally live if they'd let me) and picked out some fun porch stuff.

Then I went to Home Depot in search of some hanging plants.  The nursery at the HD at South Bay Center, for those of you in Boston, is nowhere near as impressive as the nursery at the Lowes in Dedham.  It's a little further from us, but it was worth the trip.

Just a sidenote: Purchasing plants is a big step for me.  I have never successfully kept anything alive, ever, but I've had a little more success over the past year.  I have a plant in my office that my parents sent me on my first day of work that is still alive (go self!).  Our neighbor gave us a hanging plant in October or so that we kept alive indoors all winter, but I can't say it's doing too well on the porch right now.  We'll see if it perks up a little.  We also have a basil plant from the same neighbor, which is doing great but has very tall stalks that keep bending over.  The last plant in our lives is a geranium that I got recently as a party favor.  It looks a little sad but I'm not sure if that's how geraniums are supposed to look, so TBD on that one.

Back to Lowes - Although my original idea was to get some plants (which scare me less than flowers), the hanging plants were $14.99 and hanging flowers were $7.49.  If I kill something that only cost $7.50, I will feel much less sad than if I kill something twice that expensive, so I got two pots of petunias and came home to set things up.

When Drew arrived home from chaperoning 44 eighth graders on a four-day field trip through Washington D.C., he found this:


Drew was ecstatic, mostly because he knew he'd escaped an Ikea trip but also because now we can sit on a nice porch.  You can even sit out in the rain without getting wet!  All of our overgrown vegetation makes you feel a little bit like you're in a jungle/forest/swamp (but in a good way).  Everyone should come on over and sit on the porch with us! (But only if we know you.)


Friday, May 25, 2012

Crowdsourcing the Tile Decisions

We've been hemming and hawing over the tile decisions.  We've purchased four boxes of white subway tile and some mastic, along with a tile cutter and a notched trowel, and ...

They are still sitting in the corner of our kitchen. 

To be fair, we've had a couple of insanely busy weekends, with nary a moment to sit and enjoy a cup of coffee, much less start tiling backsplashes.  The last thing either of us wants to do when we get home from work on, say, a Tuesday, is start a DIY home improvement project that neither of us has any idea about.  Yes, I'm sure it's pretty easy once you get going, but it's the "getting going" part that has us a little wary.  Drew has further declared that he wants to tile with "someone who can actually help" instead of his increasingly off-balance wife.  I told him I could still climb on counters and he told me I was crazy.  Harumpf.  So if you are "someone who can actually help" in the Greater Boston area, I will ply you with all the beer and pizza you can handle (or with whatever food/beverage combo your heart desires) to come help Drew tile our kitchen.  Also everlasting gratitude.  Bonus points if you have ever tiled a wall before.  

Anyway. 

The final reason we haven't started tiling yet is that we're not entirely sure what sort of aesthetic we're going for, particularly on the large wall behind the sink.  To refresh your memory, the space will be tiled to some degree and there will be open shelving along the length of the wall.  We're thinking nicely stained/polyurethaned wood with wrought iron brackets for the open shelving but haven't decided whether we want two shelves or three.  


This photo is pre-countertops and sink, but you get the idea.  There is also some funny business to deal with on the left:


Notice the trim piece that sticks out and that weird box.  Also how the ceiling is super crooked where it meets the wall.  (Some of that is uneven paint, but not all of it.)

Do we tile all the way to the ceiling and shave tiles as necessary to get a good fit?  Do we stop several inches short?  If so, do we finish with offset tiles or do we use border pieces?  How do we butt the tiles up against the door frame?  Border or not?  If the tile extends above the door frame, how do we deal with that?  The only tile-placement decision I've made for certain is that the tiles in the corner by the sink will just smash up against that wall - half tile, whole tile, partial tile, whatever - they'll just be right in the corner with no border or anything.  

And then there are the grout decisions.  White grout?  Dark grout?  Medium grout?  We have black grout on hand from when we regrouted the bathroom but I'm not opposed to white or gray either.  

So, in the spirit of the modern age, I've decided to ask YOU (whoever you are) what you think we should do.  I've assembled the photos below courtesy of Apartment Therapy's helpful and timely article, "10 Inspiring Uses of Subway Tile in the Kitchen."  They really capture the range of options.

Here's your assignment:  After you've put your creative minds to work, please help us make some decisions!  Leave your comments ON THE BLOG (not on Facebook, s'il vous plait) and we will sort through all the pearls of wisdom and make some choices.  To recap, we are wondering: 

1. What color grout to use
2. How high the tiles should go behind the open shelving
3. How to deal with the edging near the door and above the door
4. Whether to cap off the highest row of tile with a border or leave it plain

White grout, tile ends at the ceiling, no border on the top or edge

This is NOT subway tile, but whatever.  Darker grout and what looks like a quarter round border at the top.
Also notice their left edge is totally unfinished.

Darker grout, no top border, tile ends several inches below the ceiling.
Also, these brackets have the aesthetic we're after for the open shelving.

Darker grout, ends with a border at the top, butts right up against the window frame with no border.

Ends below open shelving, no border at the top, slightly darker grout,
wraps around to the adjacent wall (where I don't see a border, but I could be wrong).

I'm also not sure if I would call this subway tile, but it's still cool.
Lighter grout (though maybe not white?) and no borders anywhere.  

No borders, darker grout, ends above one shelf and below the other.
Also, these people have a real thing for eggs and egg cups.  And carbs.

White grout, tile everywhere, no borders.

I can't really tell whether the tile ends at the beam with a border or whether the beam goes over the tile, but these people also have a trim piece that sticks out. 

Border at the top, darker grout, no borders on the sides.
Also, this is the tone of wood shelving we're thinking about. 

So there you have it.  Please help us!


Sunday, May 13, 2012

An Ode to Our Kitchen Sink

Okay, so it's not an ode.  Senior English was a long time ago and I'm a terrible poet.  But, if I were a better poet, I would totally write lots of flowery poetry about our new kitchen sink.  Instead, I will write a list.  I'm very good at lists - just ask Drew.


Four Things I Love About Our New Sink

1.  It's 9-10 inches deep.  Our previous sink was 7-8 inches deep and I was forever getting water all over the place trying to wash the cutting board or the pasta pot.

2.  It is flat on the bottom.  The previous sink was sloped from the sides to the drains, so anything you tried to place in sink slid into the drain.  And sometimes shattered into the garbage disposal.

3.  We bought one of those suction cup sponge holder thingies to hold the sponge so it's not making puddles on the counter when Drew forgets to squeeze it out.  That's not really the "sink," exactly, but it's in the sink, so it counts.

4.  It's mounted under the counter and is not dropped in on top of the countertop material, making it easy to wipe crumbs straight into the sink.  Drew is the crumb-making master of the universe, so this is an important feature for my sanity and/or our marital bliss.

Although the sink is quite a star, there's another act in town that might steal the spotlight:


The faucet!  It's by Moen (you'll have to imagine the umlaut) and it's glorious.

Things I love about the faucet

1. It's tall, making it a snap to wash cutting boards and pasta pots (and hopefully our daughter-in-progress) without flooding the counter.

2.  It has a rockin' "spray" function (pictured above).

3.  If you pull on the head of the faucet, a really long hose comes out and you can spray everything.  There is no pressure loss when you are using the hose and it smoothly retracts back into the neck of the faucet when you're done.

4.  It's made of some kind of fingerprint-free material.  There are no water spots or fingerprints on it after a week of use - we'll see if it lasts, but so far I'm super impressed.

5.  It came with a soap pump that we put dish soap into.  One less bottle cluttering the counter!  (Sidenote: Our old sink had this function too, but the nozzle was so grimy, we never bothered to use it.  However, while we were setting up the new soap pump, Drew had an epiphany.  The mysterious blue bottle is the dish soap from the old sink!  The demolition guys took it out before they dismantled the sink and saved for us (reason unknown).  Mystery solved.)

There was nothing I liked about our previous faucet.  The faucet itself was this squat little thing that didn't swivel very well, making it difficult to wash tall things.  The sprayer was not attached to the faucet and was a cheap plastic model that had a really wimpy spray and a really short hose.  You couldn't even spray down the sides of the sink properly.  Somehow though, we were always battling countertop flooding.  Never did figure that one out.  Finally, there were fingerprints and water spots everywhere, all the time, no matter how hard I tried to fight it.

The garbage disposal and the dishwasher also work now, which is great.  Even though I would wash all the dishes in the world in our fancy new sink, I'm a huge fan of our dishwasher too.  And that garbage disposal.  I just don't know what I'd do without a garbage disposal.

So there you have it.  Our remaining projects in the kitchen are as follows: 
- Tile backsplash near stove
- Tile wall above sink
- Grout everything
- Install open shelving
- Replace horrible overhead light
- Touch up trim, including spots that have been recently replaced.

We're getting there!  Until we do the rest of the stuff on the list though, we're ecstatic to be able to cook and clean in our kitchen like normal people.  We'll be having people over for dinner again in no time!


Tuesday, May 8, 2012

It's like Christmas!

The countertop installation crew came yesterday and stayed for a mere 45 minutes, but not before installing three lovely slabs of Azul Platino granite in our kitchen.


They placed the first slab to the right of the sink.  The countertop extends to the edge of the wall, which isn't quite as far from the cabinet as it looks - that blue tape is stuck to the cabinet, not the wall.  We also got a slab for the far side of the sink - don't worry.


The largest slab is in the sink area.  In our old apartment, we had granite countertops (which we loved) but there was a pesky seam that got crud caught in it ALL. THE. TIME. It was super gross and there was no amount of scrubbing that would make it truly clean.  No more of that, folks.  We're totally seamless now.

Sorry for the blurriness.  Again with the phone camera...  It's also worth noting that the granite isn't quite as dark as it appears in these photos.  It's pretty uniform, pattern-wise, and has little sparkly bits in it.  It makes a satisfying sound when you put a glass or a pot or something on it and it's my new favorite thing.

The crew also glued the sink to the underside of the countertop.  We went with an undermount sink so that we could sweep the crumbs from the work surface directly into the sink without needing to go up and over the edge of a drop in sink.  We had to do this in the previous iteration of the kitchen, which led to yet more crud that was virtually unscrubbable.  (Favor: Please say "unscrubbable." So fun.)

The installation process was super fast.  The guys hauled in the slabs, heave-ho'd them up onto the cabinets, grunted and groaned and pushed them all into place (perfect fit, btw, even in the tricky little area near the sink), put some caulk in the crack between the counter and the wall, and presumably did something from the underside as well (I missed that part).  They glued the sink in and were off on their merry way.

One funny thing happened.  I was standing in the living room and saw one of the crew members sort of lurking in the doorway between the dining room and the kitchen.  I looked up and he asked "can I have some water," and held up a glass.  I said, "Of course! Right in the bathroom" (Isn't that where you keep YOUR drinking water??) before realizing that the thing he was holding up looked suspiciously like one of our stemless wine glasses.  They were sitting on the shelf in the pantry, ripe for the taking, and it made me chuckle that the countertop guy was jonesing for some water in a crystal wineglass.  Also I was hoping that he wouldn't break it.

But then I realized he was holding up a particularly well-shaped water bottle whose top half had been cut off.  Then I laughed out loud and everyone looked at me like I was a lunatic.  Par for the course.


And then Drew cooked dinner on our countertops!  And it was delicious.  And then I washed the dishes in the bathroom FOR THE LAST TIME!  The plumber comes today to hook up the sink, the garbage disposal, and the dishwasher.  Hallelujah, I say.


The strange bottle of blue liquid, which was not in this spot yesterday, has made yet another appearance.  This time it was considerate enough to put down a paper towel.  We'll see whether the plumber takes it away or whether it's our "gift with purchase."  Only time will tell...


Monday, May 7, 2012

That Awkward In-Between Stage

So we've been patiently waiting for our countertops to be made.  We've been cooking on our stove, using our kitchen table as counter space, and washing all of our dishes in the (very small) bathroom sink.  This is the type of delay we expected, but that didn't make it any more fun.  I'm just glad we renovated the bathroom before we did the kitchen - it would have been awful to wash dishes in the previous bathroom sink, looking at those horrid yellow and purple sponge painted walls, and standing on that moldy linoleum.  But I digress.

Before the countertops go in we had to deal with some of the crew's more artistic work.  You'll remember that some two-year-old disguised as an adult wiped their fingers on the wall:


and there was a lot of very rough plaster all over our fancy teal paint:


Drew sanded down all the rough surfaces, spackled a few holes, and primed the plaster:


Then he repainted all the areas that won't be covered in tile.  We're not sure how high we're going to take the tile behind the sink, so we brought the paint down fairly far from the ceiling.  


Ta da! (ish)


Other things we've done during the delay include putting all our stuff in the kitchen cabinets, buying drawer liner at Ikea so we can keep the drawers/shelves in mint condition, and putting the dining room back together.


Ahhh... No more boxes...

Even though some people poo-poohed our decision to do open shelving above the sink instead of closed cabinets, I'm happy to report that we have PLENTY of cabinet space to spare, even with all our stuff back in the cabinets.  That pantry is second to none when it comes to storing a ton of stuff - it's just too bad we couldn't have a pantry *and* a walk-in closet.  Oh well.

Side note: Sorry the quality of these photos is sort of blah.  Our real camera (which isn't too great itself, truth be told) stopped working this week and so these are iPhone specials.

The countertop fellas should be here pretty soon.  I am focusing all my energy on hoping that the granite is perfectly cut, that the sink fits in nicely, and that they will go away lickety split so I can make dinner on my fancy new countertops.  The plumber is set to hook up the sink, garbage disposal, and dishwasher tomorrow, so (FINGERS CROSSED, EVERYONE) our kitchen will be 100% functional as of tomorrow evening!


Saturday, April 28, 2012

We're Cooking!

Excuse the brief blogging hiatus.  I've been too busy COOKING in my KITCHEN with my STOVE.


Yes, that is a pasta pot.  Yes, there is pasta cooking away in there.  Yes, we were totally overzealous with our first home-cooked meal after ten nights of eating raw things and takeout and forgot that we still had to wash the dishes in the bathtub.  

Whatever.  It was delicious.  Other notable things about the above photo: 

1.  The microwave is also properly installed and works like a charm.  The color of the microwave is ever so slightly less white than the cabinets, which makes me cringe, but it is what it is.  It's not worth $350 for a new over-the-range microwave right now.  Our plan is to replace the appliances as they go kaput and/or in advance of selling our house down the road.  People keep saying "don't make things nice to sell the house, make things nice for yourselves."  In general, I agree with this philosophy (as evidence, please refer to the current kitchen renovation project).  Because the appliances still work like a charm, however, they are doing what they need to do and I'm fine with them as is.  I'll get over the ugly. 

2.  We have clearly had a visit from the electrician.  The microwave and stove work, the outlets are in the wall, and the under-cabinet lighting is installed.  We decided to go with xenon lights because they have a nice natural-ish light quality to them but don't burn your brain like LEDs.  Also, XENON sounds like a superhero and we could all use more superhero stuff in our lives. 

3.  We now have drawer pulls!  My weekend to-do list includes dustbuster-ing the insides of all the cabinets and drawers, wiping them down, and putting all my kitchen stuff away.  Our guest room (which is currently full of kitchen stuff) will be a guest room again by the end of the weekend!  Our dining room which has been hosting many, many cardboard boxes for quite some time, will be mostly a dining room by the end of the weekend as well.  There are still some boxes left but not so many that we can't put the table back in it's proper home.  


More evidence that the electrician has paid us a visit -
garbage disposal switch on the right and outlet on the left.
The bottom of the dishwasher is still very ... exposed ...

There are still a few more odd things about the kitchen:

This blue bottle (with no cap on it) has been in the kitchen since the day the crew arrived.  I have no idea what it is.  Windex?  Poison?  Blue gatorade?  Could be anything.  


Someone wiped their dirty man fingers on my wall.  


And the last, most annoying thing is that all the electrical outlets and switch plates are off-white.  This wouldn't be a problem if we weren't going to tile the wall with white subway tile.   


Le sigh.  If the electrician is going to come back, I think I will have him switch the visible stuff out for white outlets and switch plates.  If not, I'll either live with it or we will put on our rubber shoes and hold our breath and switch them out ourselves.  

There are also no countertops.  And no sink.  And no backsplash tile.  And the walls need repainting.  And the floor needs major steam cleaning.  But we're trying not to think about that and just gaze lovingly at our working stove, microwave, and superhero under-cabinet lighting.  


Aahhh...